
Investing in a premium human hair wig is a great way to enhance your personal style. Learning exactly how to install a lace front wig ensures a seamless hairline and extends the lifespan of your unit. Let’s learn this important technique together.
Essential tools and products for a professional installation
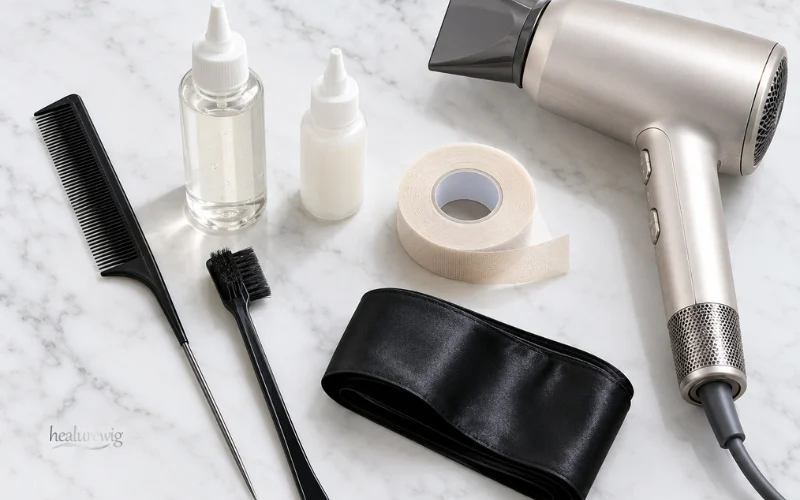
Before you begin the installation process, the first step is gathering the proper tools. The very best foundation for a flawless, long-lasting hold that focuses on the health of your scalp is proper preparation.
Professional stylists depend on high-quality accessories to create that highly sought-after, untraceable finish. Having these specialized items ready guaranties your premium wig sits perfectly and comfortably every single time.
You also protect the delicate materials of high-end wigs when you invest in top-tier installation tools. Using the correct items prevents excessive wear and tear on the delicate lace foundation.
Here’s the professional toolkit you will need to make on successful installation:
- Rubbing alcohol: Essential to remove natural oils and get the best grip from the adhesive.
- Scalp protector: An essential barrier to protect skin and extend the life of your wig.
- Wig adhesive or double-sided lace tape: The main thing holding your install.
- Lace tint spray or matching foundation: To blend the lace into your own skin tone.
- Rat-tail comb and edge brush: Precise tools for pressing lace and styling delicate baby hairs.
- Lace melting band or silk scarf: Gives the tension to create the seamless hairline melt.
- Blow dryer: Only for the cool setting to cure adhesives safely.
Step 1: Prepping your natural hair and scalp
The secret to a perfect wig install is prepping your natural hair correctly. Even the most costly human hair wig will look unbelievably fake without a smooth, healthy foundation.
You’ll want to deep condition your natural hair before starting this process (highly recommended). This keeps the scalp healthy and moisturized, preventing severe irritation and allowing for natural hair growth under the unit.
Taking the time to prep correctly elevates the final appearance of your luxury wig. This foundational step is exactly what separates amateur applications from professional, salon-quality results.

Braiding and flattening your natural hair
A completely flat foundation is strictly non-negotiable for achieving a premium, natural look. Any bulkiness beneath the lace unit will completely ruin the beautiful illusion of a natural scalp.
For individuals with longer hair, carefully styling small, neat cornrows or flat twists is highly recommended. These flat braids distribute the volume of your natural hair evenly across your scalp.
If your natural hair is quite short, slicking it back tightly with a strong gel works perfectly. The ultimate goal is to create the flattest possible canvas for the wig to rest upon.
Cleansing the hairline and protecting the skin
Proper skin preparation guarantees that your chosen adhesive grips securely without prematurely lifting. Always use a gentle rubbing alcohol wipe along the hairline to remove all natural oils.
It is also vital to remove any lingering sweat, skincare products, or makeup residue. Adhesives bond significantly better to completely bare, deeply cleansed skin than to oily surfaces.
Next, always apply a high-quality scalp protector to create a safe, chemical barrier. This vital step helps to keep painful skin irritation at bay and offers your natural edges strong protection during extended wear.
Step 2: The bald cap method (for an undetectable base)

The bald cap method is an advanced method that is used to create an invisible lace foundation. It creates a seamless “faux scalp” that adds dramatically to the realism of any professional install.
First, gently stretch a flesh-colored, super-thin stocking cap over your perfectly flattened natural hair. Pull it down snug over your forehead and ears for maximum possible tension.
Then spray evenly with a firm hold spray or apply a thin layer of styling gel to your natural hairline. This product mounts the stocking cap directly to your skin for a snug fit.
Use a blow dryer on a cool setting to thoroughly dry the product you’ve applied. Let the gel or spray dry completely before you start the delicate cutting phase.
Carefully trim off the excess stocking cap just a short distance in front of the glued hairline. Do this step slowly, so you don’t accidentally cut your natural hair or skin.
This process produces a very smooth surface that resembles the scalp and is ready to accept adhesive. It provides a perfect background to show off the exquisite parting space of a premium human hair wig.
Step 3: Customizing your lace front wig
High-end human hair wigs arrive perfectly ready to be tailored to your unique facial features. True customization is the defining factor that separates a basic look from a high-end, customized salon finish.
Customizing the lace ensures that the wig frames your face identically to natural hair growth. Taking the time to adjust these details maximizes the aesthetic return on your luxury investment.
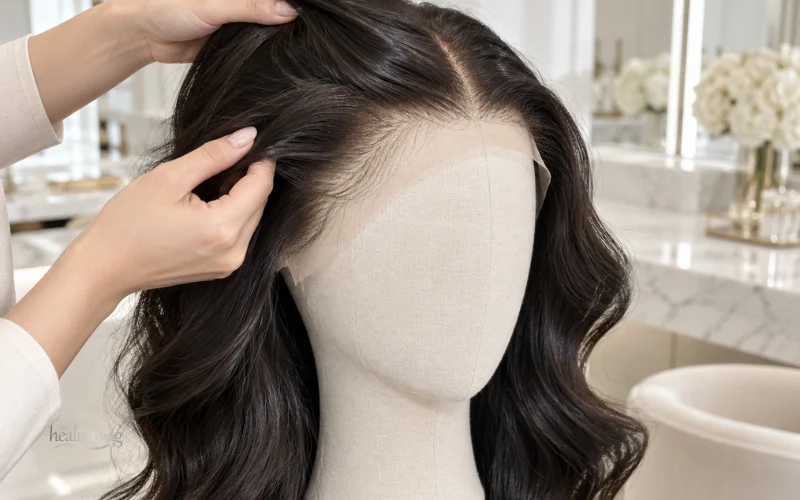
Plucking the hairline and bleaching the knots
Bleaching the tiny knots on the lace brilliantly mimics hair growing directly from your own scalp. This chemical process safely removes the visible dark dots at the base of each individual hair strand.
The bleaching process requires careful attention to the specific developer volume being used. Leaving the bleach mixture on for too long can weaken the delicate knots and cause premature shedding.
Gently plucking the hairline with tweezers creates a very natural, gradual density gradient. This essential technique prevents the wig from having an artificial, bulky “helmet” appearance at the front.
When plucking, always use high-quality tweezers and work slightly behind the very first row of hair. This careful technique ensures you do not accidentally tear the delicate, premium lace material.
Tinting the lace
Perfecting the lace color is the ultimate final step in the visual customization process. A well-tinted lace base practically disappears seamlessly into the skin upon initial installation.
Apply a dedicated lace tint spray or your preferred daily makeup powder directly to the underside of the lace. Lightly buff the product into the material for a perfectly even, consistent color distribution.
This strategic application means the lace is a flawless match to your precise skin tone and undertones. It makes the perfect illusion that you have real human hair growing out of your scalp.
Step 4: How to install a lace front wig (with adhesive)
Professional adhesive application requires a lot of patience and absolute precision. By following these step-by-step foolproof instructions, you are sure to have a secure hold that looks incredibly natural and flawless.
The method of application heavily dictates the overall longevity of your luxury wig installation. High-quality waterproof adhesives are especially ideal for maintaining a flawless look in highly humid climates.
Remember that supreme patience is your greatest tool when applying any liquid wig glue. Rushing this delicate step almost always results in a messy, visible, and deeply frustrating finish.

Applying the adhesive
The universal golden rule of liquid wig glue is applying incredibly thin, even layers. Carefully spread a very thin layer of adhesive just slightly in front of your natural hairline.
Allow this initial layer of glue to dry completely until it becomes clear and highly tacky. Never apply your premium lace directly onto wet, white adhesive under any circumstances.
Applying two to three subsequent thin layers prevents unsightly white residue from forming later. This multi-layer technique ensures a formidable stronghold that can easily withstand daily activities.
Always use a cool blow dryer to speed up the crucial drying time between adhesive layers. This guarantees the glue cures properly and bonds securely to both your skin and the lace.
Positioning the wig and tacking down the lace
Once the glue is tacky, carefully pull the wig forward and meticulously align your center part. Make sure the delicate ear tabs sit very comfortably and completely evenly on both sides.
Proper alignment is paramount because repositioning glued lace can quickly become incredibly messy. Take a moment to check your profile in the mirror before pressing anything down permanently.
Gently press the fine lace directly into the tacky adhesive using the metal end of a rat-tail comb. Work methodically from the exact center of your forehead, slowly pressing outward toward your temples.
Apply firm, consistent pressure with the comb to ensure the lace fully embeds into the glue. This technique flattens the edge beautifully and prevents unwanted lifting around the perimeter.
Cutting the excess lace
You should never cut your wig’s lace in a perfectly straight, geometric line. Using a jagged, zig-zag motion with small scissors perfectly mimics the natural irregularities of a human hairline.
Take your time and carefully cut as close to the glued hairline as comfortably possible. Be extremely careful not to accidentally snip away the baby hairs or the carefully plucked edge.
Using small, sharp cuticle scissors or a specialized eyebrow razor yields the absolute best results. The jagged edge created catches the light differently, making the lace border virtually invisible to onlookers.
If any small sections of lace lift after cutting, simply apply a tiny dot of glue beneath them. Press the lifted area down firmly and allow it to dry completely before styling.
Step 5: The “melt” – achieving an invisible hairline

The melting process is the best kept secret of an invisible salon-quality hairline finish. This important phase allows the lace to melt into your skin for an insanely seamless finish.
Begin by applying a specialized lace melting spray or styling mousse generously along the glued edge. Next, deliberately tie a silk scarf or elastic melting band tightly over the entire hairline.
Leave the melting band firmly in place for a minimum of 10 to 15 minutes. The powerful combination of physical tension and styling product forces the lace to disappear completely.
While the band is working its magic, you can begin styling the lengths of your human hair wig. Using heat tools on the mid-lengths while the hairline sets is a great time-saving technique.
Once you carefully remove the melting band, the lace should be completely undetectable to the eye. You can now gently style any baby hairs using a small edge brush and control paste.
Step 6: How to install a glueless lace front wig
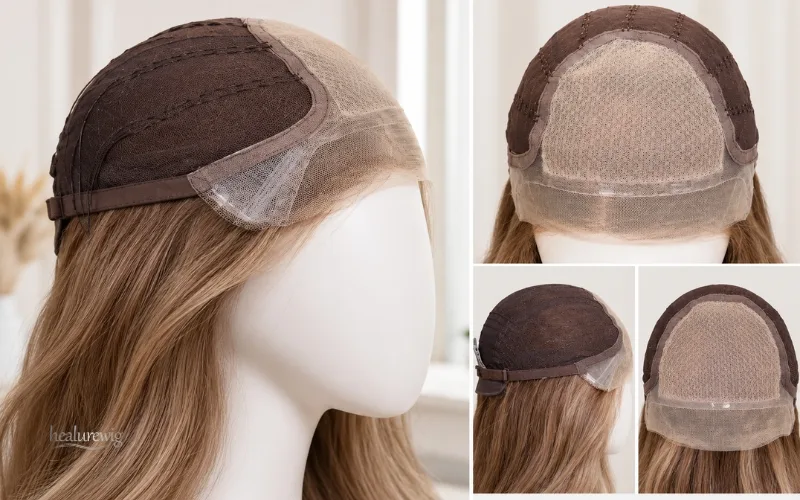
Glueless installations are absolutely perfect for individuals dealing with highly sensitive skin conditions. They also cater wonderfully to users who strongly prefer to remove their luxury wigs daily.
The global demand for glueless installations has skyrocketed due to their sheer convenience and comfort. They offer an incredible level of styling versatility while aggressively prioritizing the health of your scalp.
Premium units often come securely equipped with an adjustable elastic band securely sewn inside. This internal band pulls the delicate lace taut against your forehead without ever needing chemical adhesives.
Use these adjustable straps, elastic bands and internal combs to add custom tension. The wig fits beautifully snug and stays perfectly secure without the use of harsh liquid glues.
Try a styling mousse or a water-soluble holding spray around the perimeter for a temporary, flexible hold. This gently but comfortably tacks the lace down, thoroughly protecting your natural edges from breakage.
Expert maintenance: Caring for your installed wig
Premium human hair units are a luxury investment and require dedicated, consistent upkeep. Excellent maintenance guaranties the beautiful hair of its natural luster and super silky texture.
With proper care routines, high end investment will live elegantly for years, not months. You need to know how to handle the delicate lace and the premium strands if you want to be satisfied for a long time.
Avoid using heavy, oil-based hair products anywhere near the lace base of your wig. These heavy oils will slowly break down the adhesive bond and inevitably cause the lace to lift.

The nighttime routine
Actively protecting your human hair at night prevents severe tangling and perfectly preserves the hairline melt. Always wrap the hair gently in a high-quality silk or satin sleep bonnet.
For luxuriously long human hair, gently braid it into a loose plait before sleeping. This simple preventative step completely eliminates the risk of severe matting and difficult morning tangles.
Always tie down the frontal lace with a soft silk band before going to sleep. This constant, gentle tension ensures the adhesive remains secure, making the beautiful install last significantly longer.
Avoid sleeping on extremely rough cotton pillowcases, which aggressively strip moisture from the hair. Silk or satin pillowcases provide an excellent secondary layer of protection for your premium unit.
Safe removal practices
Safe removal is absolutely critical to protecting your sensitive skin and natural delicate hairline. You must never pull, forcefully rip, or aggressively tug the lace away from your scalp.
Improper removal is the leading cause of entirely preventable hairline damage and lace tearing. Taking your time during this step preserves both your natural hair and your luxury wig.
Generously saturate the glued hairline with a specialized adhesive remover or rubbing alcohol. Allow the chosen solvent several minutes to fully break down the stubborn glue bonds.
Wait patiently until the delicate lace rises of its own accord, gently and entirely. After removal, use a soft micro fiber cloth and gently wipe off any glue residue from the lace.
After completely removing the wig, thoroughly wash your natural hairline to remove all chemical residue. Apply a soothing, nourishing oil to your edges to promote lasting health and robust growth.
FAQs: How to install a lace front wig?
How long does a glued lace front wig installation last?
A good glued install usually lasts anywhere from 1 to 3 weeks. This timeline is very much dependent on the adhesive quality, your particular skin type, and your daily activity level.
Can you swim or shower with a lace front wig on?
Yes, when installed properly with a quality waterproof adhesive and has fully cured. However, to protect the premium human hair, exposure to chlorine should be minimized.
Why is my lace lifting, and how do I fix it?
Lifting is typically caused by residual skin oils or applying the lace onto wet glue. Fix this with a dab of glue and your melting band.
Is it better to use glue, tape, or go glueless?
This decision is very much a matter of your lifestyle and how you like to wear it every day. Glue lasts the longest, but glueless options are great for convenience and maximum edge protection.
Mastering how to install a lace front wig guarantees a flawless, incredibly natural look every single time. Start your beauty journey with Healurewig’s carefully crafted premium human hair collections with expertly pre-plucked hairlines and exquisite lace designed for an effortless melt.