
A luxury hair replacement system is a real investment in your personal style and daily confidence. Learning how to cut lace front wig units properly will mean your investment gives you an undetectable, natural hairline. High-level technique protects delicate hand-tied craftsmanship while giving you a flawless, salon-quality finish.
Why the perfect lace cut matters

A flawless hairline is the hallmark of any high-end hair replacement system. When you customize lace front wig units correctly, you bridge the gap between hair fibers and skin.
Precision trimming helps to avoid the lace edge rolling, lifting or fraying over time. This preserves structural integrity through repeated wear.
An accurate cut also protects the delicate, hand-knotted hairs along the front line. If you cut too deep, you can loosen the knots and prematurely shed the rug.
An organic outline is like the natural development of a human being. Mastering this technique guarantees that your unit remains completely invisible from every angle.
Essential tools for trimming a lace front wig
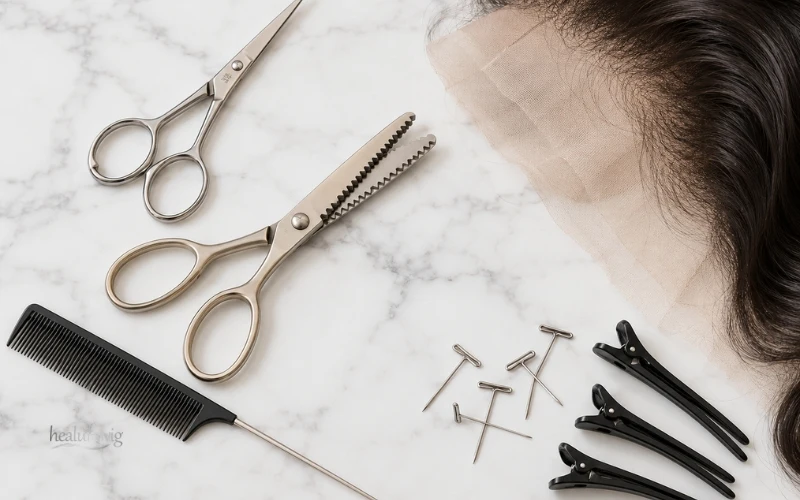
Using improper tools can snag fine mesh and ruin a premium unit. Specialized tools will guaranty clean edges and total control.
Stylists use specific tools to create clean cuts on different lace densities:
| Tool name | Primary function | Professional advantage |
|---|---|---|
| Curved micro scissors | Precision trimming near hairline contours | Allows controlled curves around natural forehead shapes |
| Pinking shears | Creating jagged micro-patterns | Prevents straight, harsh visible border lines |
| Rat tail comb | Hair parting and baby hair isolation | Keeps stray strands safely away from cutting blades |
| Sectioning clips | Securing main body hair | Prevents accidental clipping of front perimeter hair |
| Canvas block & T-pins | Pre-fit stabilization and prepping | Provides a steady surface for detailed perimeter work |
High-quality tools reduce friction against micro-mesh materials. Investing in sharp cuticle or eyebrow scissors makes trimming a lace front wig effortless and accurate.
Pre-cut preparation: Setting up for success
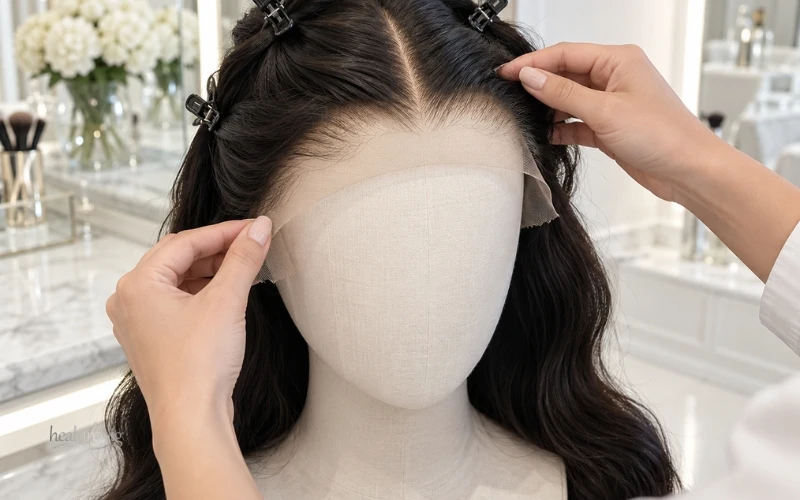
Preparation dictates ninety percent of your final result. Never rush directly into cutting without properly preparing the unit and workspace.
Start by securing all hair strands back from the lace boundary. Use sectioning clips and a small hair tie to hold every fiber safely out of the path of your blades.
If you intend to customize hair density, pluck the hairline prior to cutting. Plucking beforehand reveals the exact boundary of the hand-tied knots.
Select if you’ll be trimming on a mannequin or your own head. Trimming on your head for a custom fit to the unique curve of your forehead.
Align the middle section straight with the bridge of your nose. Make sure the internal straps are adjusted so that the lace is in full contact with the skin without tension.
Inspect the perimeter under bright lighting before making your first cut. Working out the high points and temple curves in advance prevents the rookie from making trimming mistakes.
Step-by-step: How to cut lace front wig flawlessly

Step 1: Position and align the wig perfectly
Position the wig on your head or canvas block making sure it is symmetrical in placement. Make sure that the ear tabs are positioned comfortably above your ears.
Use an elastic band or T-pins to hold the unit in place so it will not shift. An unsteady base ruins the natural perimeter by creating uneven cuts.
Make sure the frontal base lays flat on your brow. Flatten out any air bubbles or ripples across the forehead mesh.
Step 2: Make your strategic relief cuts
Relief cuts are vertical snips made from the outer edge toward the hairline. They divide a long, unmanageable lace strip into workable sections.
Make three to four relief cuts: one above the nose bridge, two at the temples, and two near the ears. This reduces tension across the forehead.
Cutting in small sections avoids accidental over-cutting. It lets you customize each piece separately to your natural skin contours.
Be sure to stop your relief cuts at least half an inch before the actual hairline. This allows safe cutting zones without compromising the main knots.
Step 3: The cutting technique (Straight vs. zigzag method)
Never cut lace in a straight line, continuous. The straight edges form an obvious ridge that catches the light and reveals the wig border.
Make small, jagged micro-cuts along the perimeter using the zigzag method. This organic edge scatters light, mimicking the shifts seen in natural skin.
Stay a micro distance of about 1/8 inch from the front hair knots. Cutting directly into the knots destroys the foundation and causes shedding.
Angle your scissors slightly as you work across each section. Take your time, making small, controlled cuts instead of long, aggressive snips.
Hold the lace taut in your non-dominant hand and trim. The blades don’t snag or tear delicate nets because of the constant tension.
Step 4: Customizing the ear tabs
Ear tabs need a lot of attention so they don’t pinch or lift.” Cut the lace carefully to follow the natural curve of your ear.
Cut a smooth C-shape around the bottom of the ear so the tab sits flat against your temple. The tab should fit comfortably without rubbing against cartilage.
If the ear tab is too long, trim the excess lace, but do not disturb the internal structural seams. Test the mobility by moving your head before you finalize.
Check both sides to ensure ear level symmetry. Improperly trimmed ear tabs can pull the entire unit out of alignment during daily wear.
Does the type of lace affect how you cut it?
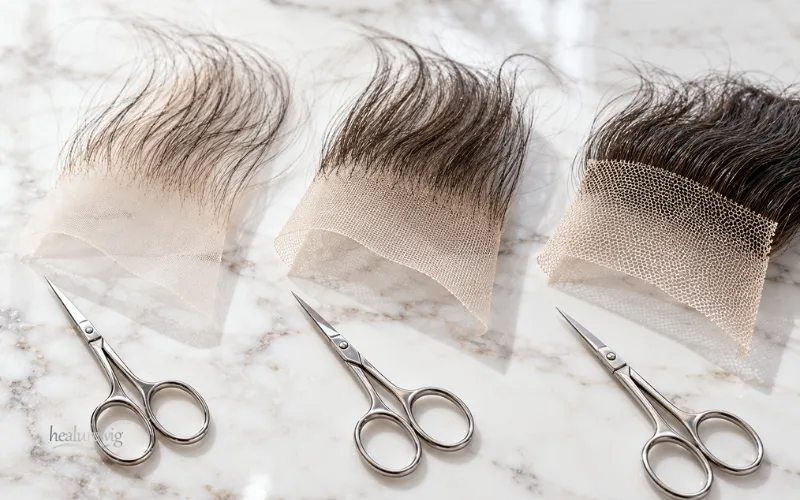
Understanding your material construction is essential for beginner lace cutting and advanced styling alike. Different lace types exhibit distinct tensile behaviors.
The HD lace is very thin and intricately woven, for maximum invisibility. You need very sharp micro-scissors and no pulling force, otherwise it tears.
TranTransparent lace is a bit stronger than HD mesh and still has great clarity. It provides you with a stable surface for accurate, easy zigzag cuts.
The standard Swiss lace is the most structurally sound for durability in the long haul. Swiss lace is thicker, so it is important to use the zigzag cutting technique to hide the edge.
You won’t get fraying if you match your scissors sharpness to your lace grade. The bases of higher quality must be handled delicately to preserve their smooth transition.
| Lace type | Thickness level | Recommended tool | Durability score |
|---|---|---|---|
| HD lace | Ultra-thin | Microcuticle scissors | Medium |
| Transparent lace | Thin / medium | Precision eyebrow scissors | High |
| Swiss lace | Medium / standard | Pinking shears or micro scissors | Very high |
Advanced techniques to “melt” the lace after cutting

Once the physical cut is complete, blending techniques integrate the remaining border into your skin tone. Professional melting turns a great cut into an invisible one.
Apply a matching lace tint spray or alcohol-free powder directly under the lace. Matching your exact undertone eliminates any pale cast along the freshly cut edge.
Use a high-grade holding gel or adhesive along your hairline skin. Press the freshly trimmed lace firmly into the product using a fine-tooth comb.
Tie a silk scarf or elastic melting band tightly over the perimeter for 10 to 15 minutes. The compressed pressure fuses the mesh smoothly against the skin.
Finish by styling fine baby hairs using edge control gel. Swooping soft baby hairs over the perimeter creates an effortless, natural frame for your face.
Reapply a light dusting of translucent powder along the hairline boundary to absorb excess shine and lock the melt in place all day.
4 common lace-cutting mistakes (and how to avoid them)

Even stylists with years of experience find customization difficult. Here are some pitfalls to avoid, to safeguard your high value unit:
- Cutting in a straight line: Creates a harsh, visible boundary that reflects ambient light. Fix: Use tiny zigzag motions to break up the line.
- Trimming too close to knots: Weakens hand-knotted bases and induces severe shedding. Fix: Leave a 1/8-inch safety border along the edge.
- Over-cutting ear tabs: Causes the sides of the unit to lift away from the scalp. Fix: Measure twice, cut the C-shape shallow.
- Using dull household scissors: Fray fine mesh threads and ruin delicate edges. Fix: Always use precision shears of professional grade.
Preventative measures help maintain the structural integrity of your hairpiece, ensuring long-term satisfaction and flawless wearability.
FAQs: How to cut lace front wig?
Should I cut the lace on my wig before or after I wash it?
It is best to cut the lace before washing a brand-new unit. Factory lace provides pristine tension and clear visibility of the original construction line. Trimming prior to washing also allows you to cleanse away any loose mesh fibers before final installation.
Do I leave a little lace on the wig or cut it all off?
Always leave a micro-border measuring approximately 1/8 inch beyond the hairline. Cutting completely up to the hair strands damages the delicate knots anchoring the hair. A little margin protects the integrity of the knot and gives the adhesive the surface area it needs for a tight grip.
Can a lace front wig be worn without glue if cut correctly?
If the lace unit is properly cut, has an adjustable band and non slip silicone grips, then you can wear it glueless. Carefully cutting around the ear tabs and forehead will allow the lace to lay flat and natural without the use of daily chemical adhesives.
What happens if I accidentally cut too much lace off?
If you trim into the hairline, do not panic. You can salvage the unit by carefully plucking a new hairline slightly further back to restore a natural gradient. Alternatively, use lace tint and edge styling gel to create swooped baby hairs that disguise the irregular edge.
Knowing how to cut lace front wig hairlines properly safeguards your investment and provides you with an undetectable, natural look every day. Combine your technique with Healurewig’s expertly crafted human hair foundations for superior lace transparency, durability and effortless beauty.